 Shop Local
 Live Chat
Posted: 11/6/20
Perfect the art of ARF servo installation on both your aileron and flap servo doors.
In this article, we focus on one of the simplest parts of ARF plane building: installing servos in your wings. Although this task may seem trivial and somewhat straightforward to an experienced modeler, it's a good time to point out a few tips and tricks that may prove useful for a novice assembler. Plus, this entire process may not be explicitly be covered in your model's instruction manual. Let's begin!
Step 1:
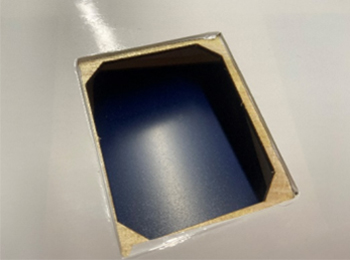
Take care in removing any masking tape that was used to secure the servo door to the wing for shipping. This is also a great time to confirm you have all the required parts/materials to complete this process. You will need your servo(s), servo extensions, a drill, a 1.5mm drill bit, cyanoacrylate (CA) glue, and a towel/rag.
Step 2:
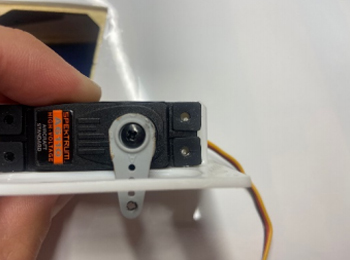
Install the rubber grommets included with your servo. Also, note that the metal inserts should be installed through the side opposite of where the screws are inserted into the servo (pictured right). This allows the larger metal surface to distribute load where the servo mates with the mounting surface. This also enables the rubber insert to do its job properly providing "shock resistance" to the servo AND the airframe, particularly important with any gas/glow engine.

Step 3:
It's a good idea to pre-drill the holes where your servo will be affixed to the servo door. If you elect to forge pre-drilling the hole, you are relying on the screw itself to make a clean journey through the wood/plastic. This can cause balsa wood to split, compromising the security of the servo. It is also important to point out that you should always use a drill bit that has a noticeably smaller diameter than that of your screw. Typically, 1.5mm is perfect for the screws used on Spektrum servos.
Step 4:
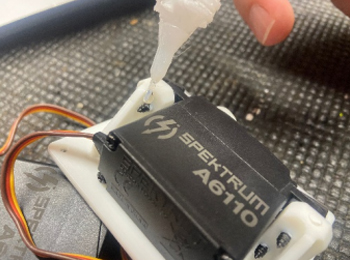
Before you install your screws, add a drop of thin CA to each hole. This strengthens the wood and provides your screw with extra "bite" as it travels through the material. Note that the door pictured here is a 3D printed door and the application of CA is not required (picture is for reference and to speak to the subject matter itself).
Step 5:
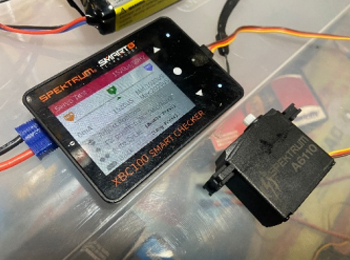
This is a great opportunity to confirm that your servo horn is centered before the final installation. The Spektrum Smart Checker (SPMXBC100) is a terrific tool for accomplishing this task. Simply power up the Smart Checker (with any EC3/IC3 battery) and use 1520 servo test menu. You can also use this tool to confirm you have a trustworthy servo by checking the full range and endpoints of your servo within this menu.
Step 6:
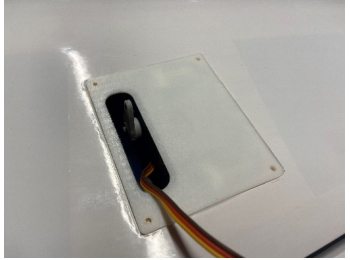
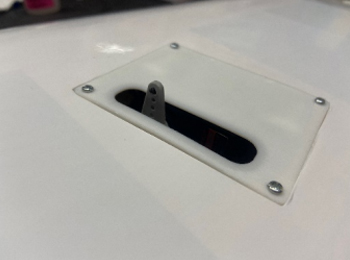
Test-fit your mounted servo door and confirm both servo and horn orientation. You can "cheat" and run the servo wire out of the door (temporarily) until you finish the installation. Also, be mindful that if you plan on using a Y-Harness for your flap system, you need to install both flap servos facing the same direction (as opposed to the ailerons, which will be opposite of each other). This can sometimes appear "wrong" if you compare the symmetry of a left-wing to a right post-installation. Reference your instruction manual for more information.
Step 7:
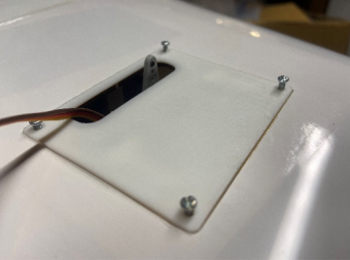
It's never a bad idea to pre-drill the holes where the door screws enter the wing. However, you will need to exercise extreme caution to avoid a "drill slip" or drilling too far through the wing (both scenarios result in holes where there shouldn't be). Instead, you can use a hand screwdriver and evenly tighten down the screws. Note that at this point, we are simply threading the balsa, NOT completely tightening down the screws.
Step 8:
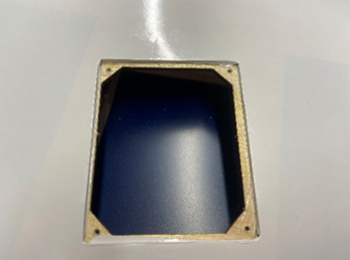
Remove the door screws and door to reveal four new perfectly threaded holes.
Step 9:
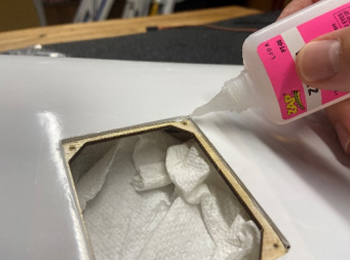
It's a great idea to add CA to these newly formed holes prior to the final installation. But first, it never hurts to stuff a paper towel or rag into the servo pocket. This prevents excessive runoff from dripping down and getting on your covering! One drop in each hole is plenty. Just remember to remove the towel from the wing before the final assembly!
Step 10:
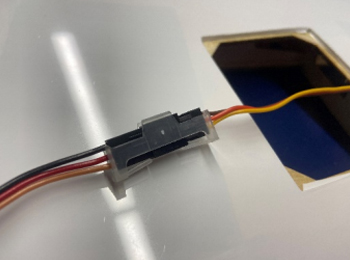
If/when you plan on using servo extensions, it's a good idea to install servo connector clips (SPMA3054). The amount of insurance provided far outweighs the additional weight incurred. Now we need to run the servo wire through the wings. Many ARF manufactures are kind enough to affix string that runs through the wing to your servo pocket. Guide your completed servo wire through the wing via your manufactures provided string or through the use of gravity and persuasion.
Step 11:
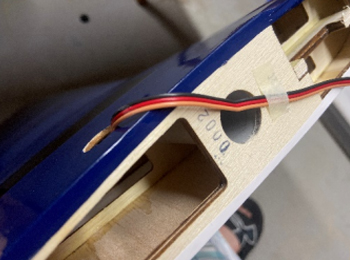
Another tip is to temporarily affix your servo wire to the outside of the wing. The best practice is to attach this tape/wire to the balsa itself, not the covering. This will keep you from having to go fishing for wire when it inevitably falls back into the wing…
Step 12:
It is now safe to install and tighten down your servo. It's good practice to evenly install the screws to prevent binding and undue stress on the wood.


")


